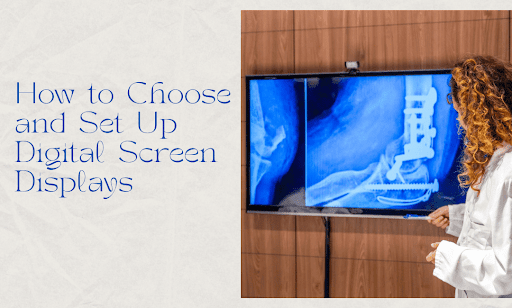
In this guide, we explore everything you need to know about digital screen displays and how it can transform your business communications.
In the blink of an eye, a customer decides whether to walk into your store or pass it by. In that split second, your digital signage can make all the difference. Gone are the days of static posters and dusty chalkboards. Today’s businesses need to capture attention and deliver their message in a flash. That’s where digital displays come in. But with so many options out there, it’s easy to get lost in the pixels.
Don’t worry, we’ve got you covered. In this guide, we’ll walk you through everything you need to know to choose and set up digital displays that will leave a lasting impression. So if you’re ready to transform your space and captivate your audience? Let’s get started.
Digital Screen Displays: Key Factors to Consider

Choosing the right digital signage display isn’t as simple as grabbing the biggest, brightest screen you can find. It’s about finding the perfect balance between functionality, aesthetics, and your specific business needs. Let’s break down the key factors to consider.
Screen Types
The world of digital displays extends far beyond the familiar LCD, LED, and OLED options. Let’s explore some additional digital signage screen types that might be the perfect fit for your unique needs:
- LCD (Liquid Crystal Display): A staple in the digital signage world, LCDs use liquid crystals and backlighting to produce images. They’re known for their affordability, wide availability, and decent color reproduction. However, their contrast ratio and viewing angles can be limiting, especially in brightly lit environments.
- LED (Light Emitting Diode): LEDs utilize tiny light-emitting diodes to create images, offering superior brightness, contrast, and color gamut compared to LCDs. They’re also more energy-efficient and have a longer lifespan. LEDs excel in outdoor settings and large-scale digital signage displays where visibility is crucial. However, they can be pricier than LCDs, especially for smaller sizes.
- OLED (Organic Light Emitting Diode): OLEDs are cutting-edge display technology, producing self-illuminating pixels that result in perfect blacks, infinite contrast, and vibrant colors. They’re also incredibly thin and flexible, enabling unique design possibilities. However, OLEDs are still relatively expensive and can be susceptible to burn-in if static content is displayed for extended periods.
- Projection: Projectors offer a unique solution for large-scale consumer displays, casting images onto walls or multiple screens. They’re versatile and can create immersive experiences, but they require controlled lighting conditions and may not be suitable for all environments.
- Transparent LCD: These innovative displays combine LCD technology with transparent panels, allowing you to see through the commercial-grade screen when it’s off. They’re ideal for retail window displays or interactive exhibits where you want to blend digital content with physical objects.
- Video Walls: Comprising multiple displays tiled together, video walls create a massive, high-impact canvas for your content. They’re perfect for attracting attention in large spaces like shopping malls or airports. However, they require careful calibration and content management to ensure seamless visuals.
Tech Specs That Matter
While screen type lays the foundation, it’s the technical specifications that truly determine a display’s performance and suitability for your needs. Let’s delve into the key specs to consider:
- Resolution: Measured in pixels, resolution determines the clarity and detail of your image. Higher resolutions like 4K (3840 x 2160) offer sharper visuals, especially for close-up viewing or large displays. However, they also demand more processing power, which can increase costs.
- Brightness: Measured in nits or candelas per square meter (cd/m²), brightness dictates how well your display performs in different lighting conditions. For indoor displays, 300-500 nits is generally sufficient, while outdoor commercial displays may require 1,000-2,500 nits or more to combat sunlight.
- Contrast Ratio: This represents the difference between the brightest white and darkest black a display can produce. A higher contrast ratio results in richer, more lifelike images. Look for a contrast ratio of at least 1000:1 for indoor displays and 5000:1 or higher for outdoor displays.
- Color Gamut: This defines the range of colors a display can reproduce. A wider color gamut means more vibrant and accurate colors. Look for displays that support a wide color gamut standard like sRGB or Adobe RGB, especially if you’re displaying high-quality images or videos.
- Viewing Angle: This specifies the angle at which you can view the screen without significant color or contrast distortion. A wider viewing angle is crucial for displays that will be seen from multiple perspectives. IPS (In-Plane Switching) panels generally offer the best viewing angles with high image quality.
- Refresh Rate: Measured in Hertz (Hz), refresh rate determines how often the image on the screen is updated. A higher refresh rate (e.g., 120Hz) results in smoother motion and reduced blur, which is beneficial for fast-paced content like sports or gaming.
- Response Time: This indicates how quickly a pixel can change from one color to another. A lower response time minimizes ghosting and motion blur, improving image clarity during fast-moving scenes. Aim for a response time of 5ms or less for optimal performance.
- Connectivity: Ensure your display has the necessary ports to connect to your content source and other devices. HDMI is the most common standard, but you may also need DisplayPort, USB, or Ethernet for network connectivity. Wireless connectivity options like Wi-Fi or Bluetooth can offer added flexibility.
- Bezel Size: The bezel is the frame surrounding the display. Thinner bezels create a more seamless and immersive viewing experience, especially for video walls or multi-screen setups.
- Lifespan: Consider the expected lifespan of the display, especially if you plan to use it for extended periods. LEDs generally have a longer lifespan than LCDs, which can save you money in the long run.
Finding the Perfect Fit for Your Business
Choosing the right digital display goes beyond just the technical specifications. It’s essential to align your choice with your business goals, target audience, and budget.
- Business Objectives: What do you want to achieve with your digital signage? Are you looking to increase brand awareness, promote products, provide information, or enhance the customer experience? Your objectives will influence the type of display, content, and placement you choose.
- Target Audience: Who are you trying to reach with your displays? Consider their demographics, interests, and behavior. Tailor your content and display placement to capture their attention and resonate with them.
- Environment: Where will your displays be located? Indoor or outdoor? High-traffic or quiet area? The environment will dictate the required brightness, viewing angle, and durability of the display.
- Content: What type of content will you be showcasing? Static images, videos, interactive elements? The content will influence the resolution, refresh rate, and color gamut you need.
- Budget: Digital displays come in a wide range of prices. Set a realistic budget and prioritize the features that are most important for your business. By managing project budget closely, you can avoid overspending while still investing in high-quality digital displays.
- Scalability: Do you anticipate expanding your digital signage network in the future? Choose a display and digital signage software solution that can grow with your business.
- Maintenance and Support: Consider the ease of maintenance and the availability of technical support. A reliable vendor can provide ongoing assistance and ensure your displays operate smoothly.
Involve key stakeholders in the decision-making process. Get input from marketing, IT, and operations teams to ensure everyone’s needs are considered. Remember, the perfect digital display is the one that best aligns with your business objectives and helps you achieve your goals. By carefully considering the factors discussed above, you can make an informed decision and create a digital signage solution that delivers results.
Now that you’ve got a handle on the key factors involved in choosing a digital display, let’s move on to the next step: setting it up for success.
A Step-by-Step Guide to Digital Display Setup

You’ve carefully handpicked the perfect digital displays for your business; now it’s time to breathe life into them. The setup process, while seemingly straightforward, requires careful attention to detail to maximize impact and ensure seamless operation. Let’s break down each step with the precision of a seasoned technician.
Step one: Plan Your Placement
The placement of your digital displays isn’t just about finding an empty wall; it’s a strategic decision that can significantly influence their effectiveness. Consider these factors:
- Visibility & Foot Traffic: Prioritize high-traffic areas where your displays will capture the most eyeballs. Entrances, lobbies, checkout counters, and waiting areas are prime real estate. Analyze foot traffic patterns and identify natural sightlines to ensure maximum visibility.
- Viewing Distance & Angle: The size and resolution of your display should correspond to the expected viewing distance. A 4K display might be overkill for a small coffee shop, while a low-resolution screen will appear pixelated in a large conference hall. Additionally, consider the viewing angle. If your display will be viewed from multiple angles, opt for a screen with a wide viewing angle to avoid color distortion.
- Ambient Lighting & Glare: The surrounding lighting conditions significantly impact visibility. Bright sunlight or harsh artificial lighting can wash out your consumer display. Choose high-brightness best digital signage screens for outdoor installations or areas with abundant natural light. Consider anti-glare coatings or strategically positioning your displays to minimize reflections.
- Accessibility & ADA Compliance: Ensure your displays are accessible to everyone, including people with disabilities. Follow ADA guidelines for placement height, contrast ratios, and closed captioning for video content.
- Aesthetics & Integration: Your displays should blend seamlessly into your environment, enhancing the overall aesthetic. Consider the size, shape, and color of the displays and how they harmonize with your existing décor. Custom enclosures or mounting solutions can further integrate your displays into your space.
Step two: Mount Your Displays Securely
A secure and stable mount is essential for preventing accidents and ensuring the longevity of your displays. Follow these best practices:
- Choose the Right Mount: Select a mount that is compatible with your display’s size, weight, and VESA mounting pattern. Consider wall mounts, ceiling mounts, floor stands, or even custom-built solutions depending on your needs.
- Weight Capacity: Ensure the mount’s weight capacity exceeds the weight of your commercial display, including any additional accessories like media players or speakers.
- Adjustability: Opt for a mount that offers flexibility in terms of tilt, swivel, and rotation. This allows you to fine-tune the viewing angle for optimal visibility.
- Cable Management: A well-organized cable management system keeps your installation clean and professional-looking, while also preventing tripping hazards.
- Safety First: Follow all manufacturer instructions and local building codes during installation. If you’re unsure about any aspect of the mounting process, consult a professional installer.
Step three: Connect Your Hardware
The digital signage hardware components are the backbone of your digital signage system, facilitating the flow of content and data. Connect them with precision:
- Media Player: This device stores and plays your digital content. Choose a media player that is compatible with your display’s resolution, connectivity options, and content management software. Consider factors like processing power, storage capacity, and operating system when making your selection.
- Cables: Use high-quality cables to ensure optimal signal transmission and prevent image degradation. HDMI is the standard for high-definition video and audio, but you may also need DisplayPort, USB, or Ethernet cables depending on your digital signage setup.
- Power Source: Provide a clean and reliable power source for your displays and media players. Use surge protectors to safeguard your equipment from power fluctuations.
- Network Connectivity: If you’re managing multiple displays or using cloud-based content management software, you’ll need a stable network connection. Ethernet is generally preferred for its reliability, but Wi-Fi can be used in certain situations.
- Additional Peripherals: Depending on your needs, you might also need to connect other devices, such as speakers, touchscreens, or interactive sensors. Ensure compatibility and proper configuration for seamless operation.
Step four: Install Your Content Management Software
Content management software (CMS) is the heart of your digital signage system, empowering you to create, schedule, and manage your content effortlessly. When selecting a CMS, consider:
- Ease of Use: A user-friendly interface with drag-and-drop functionality and intuitive controls will make content creation and scheduling a breeze, even for non-technical users.
- Content Flexibility: Choose a CMS that supports a wide range of content formats, including images, videos, live streams, social media feeds, RSS feeds, and dynamic data integrations.
- Scheduling & Playlist Management: The ability to schedule content in advance and create playlists ensures your displays always showcase relevant and timely information.
- Remote Management: Cloud-based CMS solutions allow you to manage your displays and update content from anywhere, providing ultimate flexibility and control.
- Scalability: If you plan to expand your digital signage network, choose a CMS that can accommodate multiple displays and locations without compromising performance.
- Analytics & Reporting: Track the performance of your content with built-in analytics. Monitor metrics like impressions, engagement, and dwell time to optimize your content strategy.
- Security: Ensure your CMS employs robust security measures to protect your data and prevent unauthorized access.
Step five: Create and Schedule Your Content
Compelling content is the key to capturing attention and driving results. Follow these tips to create content that resonates:
- Visual Storytelling: Use high-quality images, videos, and animations to tell your brand’s story and engage your audience.
- Conciseness & Clarity: Keep your messages brief and to the point. Use clear fonts and avoid overcrowding the screen with too much information.
- Relevance & Targeting: Tailor your content to your target audience and location. Consider demographics, interests, and the time of day or day of the week.
- Call to Action: Prompt your audience to take action with clear and compelling calls to action.
- Branding & Consistency: Maintain a consistent look and feel across all your displays, incorporating your brand colors, logo, and messaging.
- Dynamic Content: Utilize real-time data feeds, social media integrations, and interactive elements to keep your content fresh and engaging.
Step six: Test and Optimize
Once your displays are live, it’s crucial to monitor their performance and make adjustments as needed.
- Proofread & Quality Control: Meticulously check your content for spelling, grammar, and formatting errors. Ensure images and videos are high-quality and display correctly.
- Performance Monitoring: Utilize your CMS analytics to track impressions, engagement, and dwell time. Identify top-performing content and areas for improvement.
- Gather Feedback: Solicit feedback from your customers and employees to gauge their reactions to your displays and content.
- A/B Testing: Experiment with different content variations to see what resonates best with your audience.
- Regular Updates: Keep your content fresh and relevant by updating it regularly. Leverage scheduling and playlist features to automate content rotation.
- Technical Maintenance: Perform regular maintenance checks on your hardware and software to ensure optimal performance and prevent downtime.
By following these steps and continuously refining your approach, you can create a digital signage network that captivates your audience and delivers tangible results for your business. Remember, the journey doesn’t end with setup. It’s an ongoing process of optimization and adaptation to stay ahead of the curve and keep your audience engaged.
Conclusion: Your Digital Signage Journey Starts Now
We’ve journeyed together through the ins and outs of choosing and setting up digital screen displays. You’re now equipped with the knowledge to transform your business communication and captivate your audience like never before.
Let’s recap the highlights:
- We explored the diverse world of screen types, from the reliable LCD to the cutting-edge OLED, and everything in between.
- We dove deep into the technical specifications that matter, ensuring you understand the nuances of resolution, brightness, and beyond.
- We emphasized the importance of strategic placement, turning your displays into attention-grabbing magnets.
- We walked you through the setup process, from mounting your displays securely to harnessing the power of content management software.
- We stressed the significance of compelling content and continuous optimization to keep your audience engaged.
Remember, digital signage isn’t just about screens; it’s about creating meaningful connections with your audience. It’s about transforming your space into a dynamic, interactive environment that leaves a lasting impression. So go forth, armed with this newfound knowledge, and unleash the full potential of digital signage in your business. The possibilities are endless, and the results are waiting.
And if you’re looking for a partner to guide you on this journey, consider CrownTV. We offer a comprehensive suite of digital signage solutions designed to simplify the process and deliver exceptional results. From our advanced cloud-based software and diverse range of indoor and high-brightness window displays to our expert installation and implementation services, we’re here to help you every step of the way.
With CrownTV, you’ll gain access to a world of possibilities. Our intuitive dashboard empowers you to create captivating content, schedule it with precision, and manage your displays remotely with ease. Our extensive app store offers endless integrations, allowing you to customize your displays with dynamic content that engages and informs. Our powerful media player ensures seamless playback and reliability.
With over 13 years of experience and a commitment to excellence, we’re confident that we can help you achieve your digital signage goals. We’ve served a variety of industries, including retail, healthcare, education, and more, tailoring our solutions to meet the unique needs of each client. Contact us today to learn more about how CrownTV can elevate your business communication to new heights.